Over the weekend my husband and I installed a wood plank wall in our living room. This cut out around our TV is large and I've painted it red then painted it brown and I've never thought I did it justice until now. The wood plank wall is a focal point in my living room!

You can find a number of tutorials on Pinterest to install a wall like this. After looking around, we ultimately went with a tutorial from Creative Little Daisy and even took her recommendation on buying a tongue and groove wood. Rather than repeating her tutorial, I wanted to share my system from making the wall look random.
I am type A, super organized and random just isn't in my vocabulary. Doing an 8 foot wall that we stare at watching TV "random" wasn't going to work for me. I needed a system to ensure it would be random. Excel to the rescue! My wall is 99" wide (8'3") and 105" (8'9") tall. I built my spreadsheet with each column representing 1 foot and each row the size of the wood plank- 3.56".

From here, I started planning out my various lengths of wood to create 8'3" rows. I used a combination of 2 or 3 boards per row and each board went from 2' to 6'3" with a number of combinations per row. Each row combination was given a color so that I could visually see them spaced out on the wall. For example, rows 8, 19, and 30 are all yellow and have a 6' board on the left and a 2'3" board on the right. I added up the color combinations to ensure I had a good balance of rows in column M.
On the next worksheet, I copied my original chart and then removed the colors. I then began applying the various stain choices. I wanted dark, dark with sanding, a medium toned stain, a red stain, grey, turquoise, natural, and then a cream color. You'll see the lengths on each row match the spreadsheet above, but now the colors match the stain colors.

In column O, I counted out how many of each stain color I had and then Excel helped me to determine how long each board was and then how many boards I would need to buy and stain in each color. I ended up buying 7 packages of Evertrue pine boards for my wall. Each package of boards has size 8' boards and cost around $10 at Lowes.
My final spreadsheet took the stained rows and lumped like colors together so that I knew how many boards to paint/stain each color. Knowing my boards were 8' long, I was able to put a 4' and 3' of the same stain on the same row since I would be cutting the 8' board to make a 4' and 3' board.

Now, it was time for my computer work to make it's way to the garage! I started by staining all of my boards. I used a nice paintbrush and a variety of stains seen below. After the paint/stain was dry, I sanded most of them. You want a faded aged look with this project. I used an electric sander and coarse sanding sheets. Everything is stain except the Annie Sloan Provence chalk paint and the Crisp Khaki. Both I already had on hand. Chalk paint sands the best and is always my favorite!
.JPG)
I love that this color combination brings in the red of my hardwood floors, the dark wood of my entertainment center, the turquoise blue of my new dining room, and the weathered grey of my breakfast table.
Once my boards were counted, stained and sanded, I flipped them over and started measuring. I used my measuring tape and drew three things on each board- a cut line for my husband, the board's length, and then where it would appear on the wall. For example, 5' #19A is the first/left board on row #19 and then 3'3" #19B is the second/right board on row #19.
.JPG)
My husband used a table saw to cut the boards. Cutting all 42 boards took only a couple of hours.
.JPG)
He would cut and hand them to me and I would start stacking the boards together by rows.
.JPG)
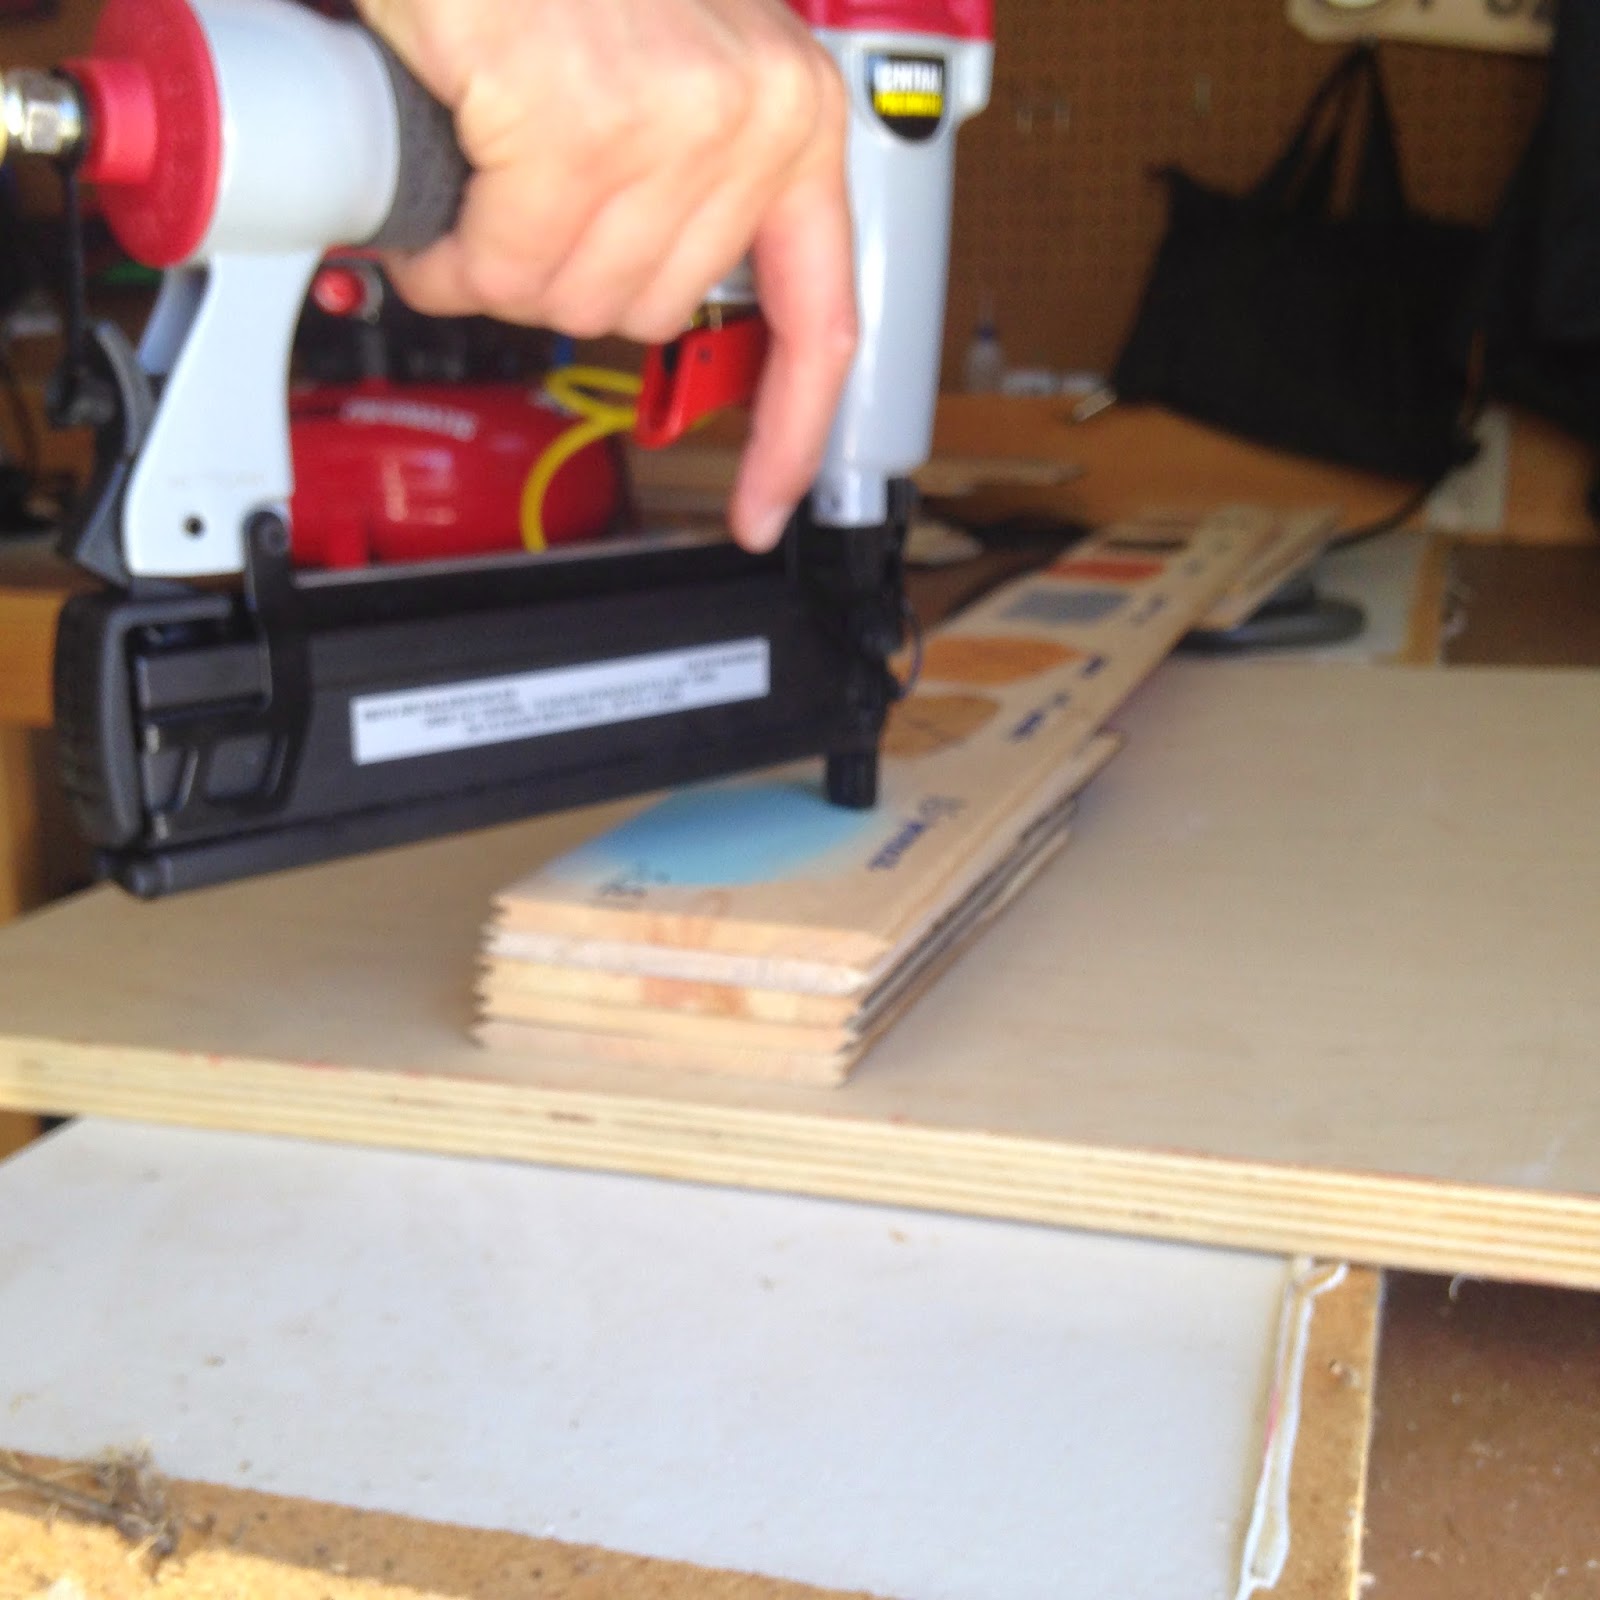
We then played around with some scraps to determine the proper PSI for the nail gun. This was a Christmas present he hadn't used yet, so it took a few trys to learn that 55 PSI was good for getting the nail into the board with minimal damage.
Install time! We removed the TV from the wall very carefully joking if my inexpensive little project led to a cracked TV it wouldn't be an inexpensive project anymore! We had already put a small whole in the wall near the TV and again at the bottom near the plugs and had run our wires through it. So, the wall was pretty clean and ready! The random plug for surround sound above the TV had always bugged me and I was happy to remove the cover and just put wood right over it!

Installing the boards was quick! We would line them up and make sure the fit was snug from wall to wall and then staple away! With the tongue and groove, I could snap them together while Marcus came back with the nail gun and we didn't have to hold boards on the wall in awkward positions.
Knowing the size of our TV, we measured out how big of a square to leave around the bracket and kept moving down the wall. We wanted to make sure if we get a bigger TV in the future, the wall won't need adjustments.

Row #30 was the last row and the most work! We ended up needing to remove about 1/2" of the board to make it butt up to the baseboard cleanly. It took a little trail and error, but looks great now.

Overall, the project cost just over $100 for boards, stains, nails, and sandpaper. I think it was $100 well spent when you see the finished project!

Our next project- old ceiling tins in our powder room! The list never ends does it?
