My daughter's fashion godmother Johnna introduced me to Steam a Seam shortly after I had my daughter and it is lots of fun to play with. I had a couple of requests recently to learn how to use it. I played tonight making gifts for 5 kids and took pictures along the way.
Decide what shapes you want to iron onto your t-shirt, onesie, bag, apron, etc. If you want to do a letter- play with fun fonts. I found 400 point font to be a good size for a young child. If you want an animal-like shape, you can google it. I googled "giraffe outline" and "giraffe coloring book". You can also visit this teacher resource site for basic shapes. Once you have the shape you want, cut it out.

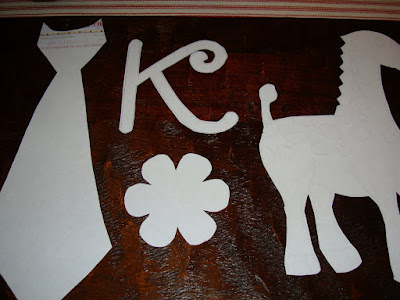
Here are examples of my cutouts- a tie (drawn from hand), a letter from Microsoft Word, a flower from Preschool Express (site above) and a giraffe from my Google search.
 Once they are cut out you want to trace the shape on your Steam a Seam sheet. S-a-S can be bought at Hobby Lobby and is about $1 per 8.5 x 11 sheet. It is essentially 2 pieces of special paper with a webbed sticky sheet in the middle. Before tracing your shape, pull apart a small corner of the S-a-S sheet. You want to trace on the paper that the webbed surface sticks to. If your image is a letter or non-mirrored image, you want to trace the reverse so that when it is completed it will be the front side. Notice my K below is backward. For the mitten, it doesn't matter.
 Once your S-a-S is cut out, remove the one side of paper backing (that you didn't trace on) and attach the remaining sheet ( sticky side and paper) onto the backside of the fabric. It should stick pretty easily. I always iron my fabric first- it'll ensure there are no wrinkles when you are tracing and heating up the fabric will help it stick.
 Now you are ready to cut your fabric into your S-a-S shape. Once that is done, peel off that last piece of paper. You are left with your fabric (picture below is the backside) in your chosen shape that has the sticky webbed surface attached.

Last step, turn the fabric over and iron the fabric onto your item. The sticky webbed surface will attach the fabric to the item.
 Along with the onesie above for a friend that just found out she is having a boy, I cut out all of these items. I'll attach them to shirts or give them as is and let their Mothers finish the last step.
 Once they are cut out you want to trace the shape on your Steam a Seam sheet. S-a-S can be bought at Hobby Lobby and is about $1 per 8.5 x 11 sheet. It is essentially 2 pieces of special paper with a webbed sticky sheet in the middle. Before tracing your shape, pull apart a small corner of the S-a-S sheet. You want to trace on the paper that the webbed surface sticks to. If your image is a letter or non-mirrored image, you want to trace the reverse so that when it is completed it will be the front side. Notice my K below is backward. For the mitten, it doesn't matter.
 Once your S-a-S is cut out, remove the one side of paper backing (that you didn't trace on) and attach the remaining sheet ( sticky side and paper) onto the backside of the fabric. It should stick pretty easily. I always iron my fabric first- it'll ensure there are no wrinkles when you are tracing and heating up the fabric will help it stick.
 Now you are ready to cut your fabric into your S-a-S shape. Once that is done, peel off that last piece of paper. You are left with your fabric (picture below is the backside) in your chosen shape that has the sticky webbed surface attached.
Last step, turn the fabric over and iron the fabric onto your item. The sticky webbed surface will attach the fabric to the item.
 Along with the onesie above for a friend that just found out she is having a boy, I cut out all of these items. I'll attach them to shirts or give them as is and let their Mothers finish the last step.
A couple of tips- wash and dry the fabric and item first. It'll make the product last longer. If you own one, you can sew the edges in a fun zig zag stitch with a contrasting color. If you don't own one ( I do not) no worries. My daughter's shirts lasted until she outgrew them. Some got a little ratty on the edges, but they still looked good. Finally, when buying fabric, a little goes a long way. I buy 1/8 to 1/4 yard each time and just keep a bin of scraps along with shapes already cut out.

Have fun creating!

Have fun creating!
